Welcome to my Kotlin series 👋! In this tutorial series, I’ll be introducing you to the Kotlin programming language, covering everything from the basics to more advanced concepts. Whether you’re a complete beginner or looking to deepen your knowledge, I hope this series will make learning Kotlin easy, enjoyable, and fun. Let’s get started!
What is Kotlin?
Kotlin is a modern statically typed programming language developed by JetBrains, first released in 2011. At that time, JetBrains’ products were primarily written in Java, and they recognized the need for a more contemporary language that offered improved syntax and greater conciseness. Kotlin is designed to work well with Java, allowing developers to use both languages in the same project easily. This means you can start using Kotlin without having to rewrite all your existing Java code.
In 2017, Google announced Kotlin as an official language for Android development, further boosting its popularity. Today, Kotlin is maintained by JetBrains, with Google supporting its use in Android development, making it a versatile choice for modern software projects, including backend and mobile app development.
Kotlin Features
Here are some of the key features that make Kotlin stand out:
-
Fully Compatible with Java: Kotlin is designed to work smoothly alongside Java, which means that you can use existing Java libraries, frameworks, and tools without any hassle. You can mix Kotlin and Java code in the same project, and Kotlin will automatically handle conversions between the two languages.
-
Statically Typed: Kotlin is a statically-typed language, meaning that variable types are checked at compile time. This helps catch errors early in the development process.
-
Null Safety: Kotlin provides built-in null safety features to eliminate the infamous “NullPointerExceptions” (NPEs) that are common in many programming languages, including Java. In Kotlin, variables can either be nullable or non-nullable. If a variable is marked as non-nullable, Kotlin ensures that you never accidentally assign null to it. If a variable is nullable, Kotlin provides safe methods to handle null values without crashing the program.
-
Modern, Concise Syntax: Kotlin has a more concise and readable syntax compared to Java. It reduces the boilerplate code that you typically need to write, making your code more compact and easier to understand. For example, Kotlin eliminates the need for getter and setter methods, and it can automatically infer types.
-
Supports Functional Programming: Kotlin is a hybrid language that supports both object-oriented programming (OOP) and functional programming (FP) paradigms. You can write clean, resuable and modular code using features like immutability, higher-order functions, and lambda expressions.
-
Smart Casts: Kotlin makes type casting easy with its smart casting feature. When you check the type of an object, Kotlin automatically casts it to the appropriate type without the need for explicit casting. This reduces the amount of boilerplate code and ensures you can work with objects more easily and safely.
-
Support for Extension Functions: In Kotlin, you can extend existing classes with new functionality without modifying their code. This is done using extension functions, which allow you to add methods to existing classes in a very clean and readable way. This makes your code more modular and helps you avoid cluttering your existing classes with unnecessary methods.
Getting Started with Kotlin
Now that you’ve learned a bit about Kotlin and its features, it’s time to set up your development environment. The great thing about Kotlin is that it can be used in a variety of IDEs (Integrated Development Environments) — interfaces used to write, edit, and compile code. In this tutorial series, we’ll be using IntelliJ IDEA, the official IDE for Kotlin development.
Install Java JDK
Before you can start developing with Kotlin, you’ll need to have the Java Development Kit (JDK) installed on your system, as Kotlin runs on the JVM. You can find detailed instructions on how to download and install the JDK for your operating system in the official JDK installation guide.
Once you’ve installed the JDK, you can verify the installation by running the following command in your terminal:
java -versionIf you see the Java version details, you’re all set!
Install IntelliJ IDEA
You can download IntelliJ IDEA from JetBrains’ website. The free Community Edition is sufficient for Kotlin development.
A better option, however, might be to install the JetBrains Toolbox, which gives you access to a suite of IDEs tailored for different project types. For example, you can use JetBrains IDEs for backend development, or Android Studio for Android mobile app development.
Launch IntelliJ
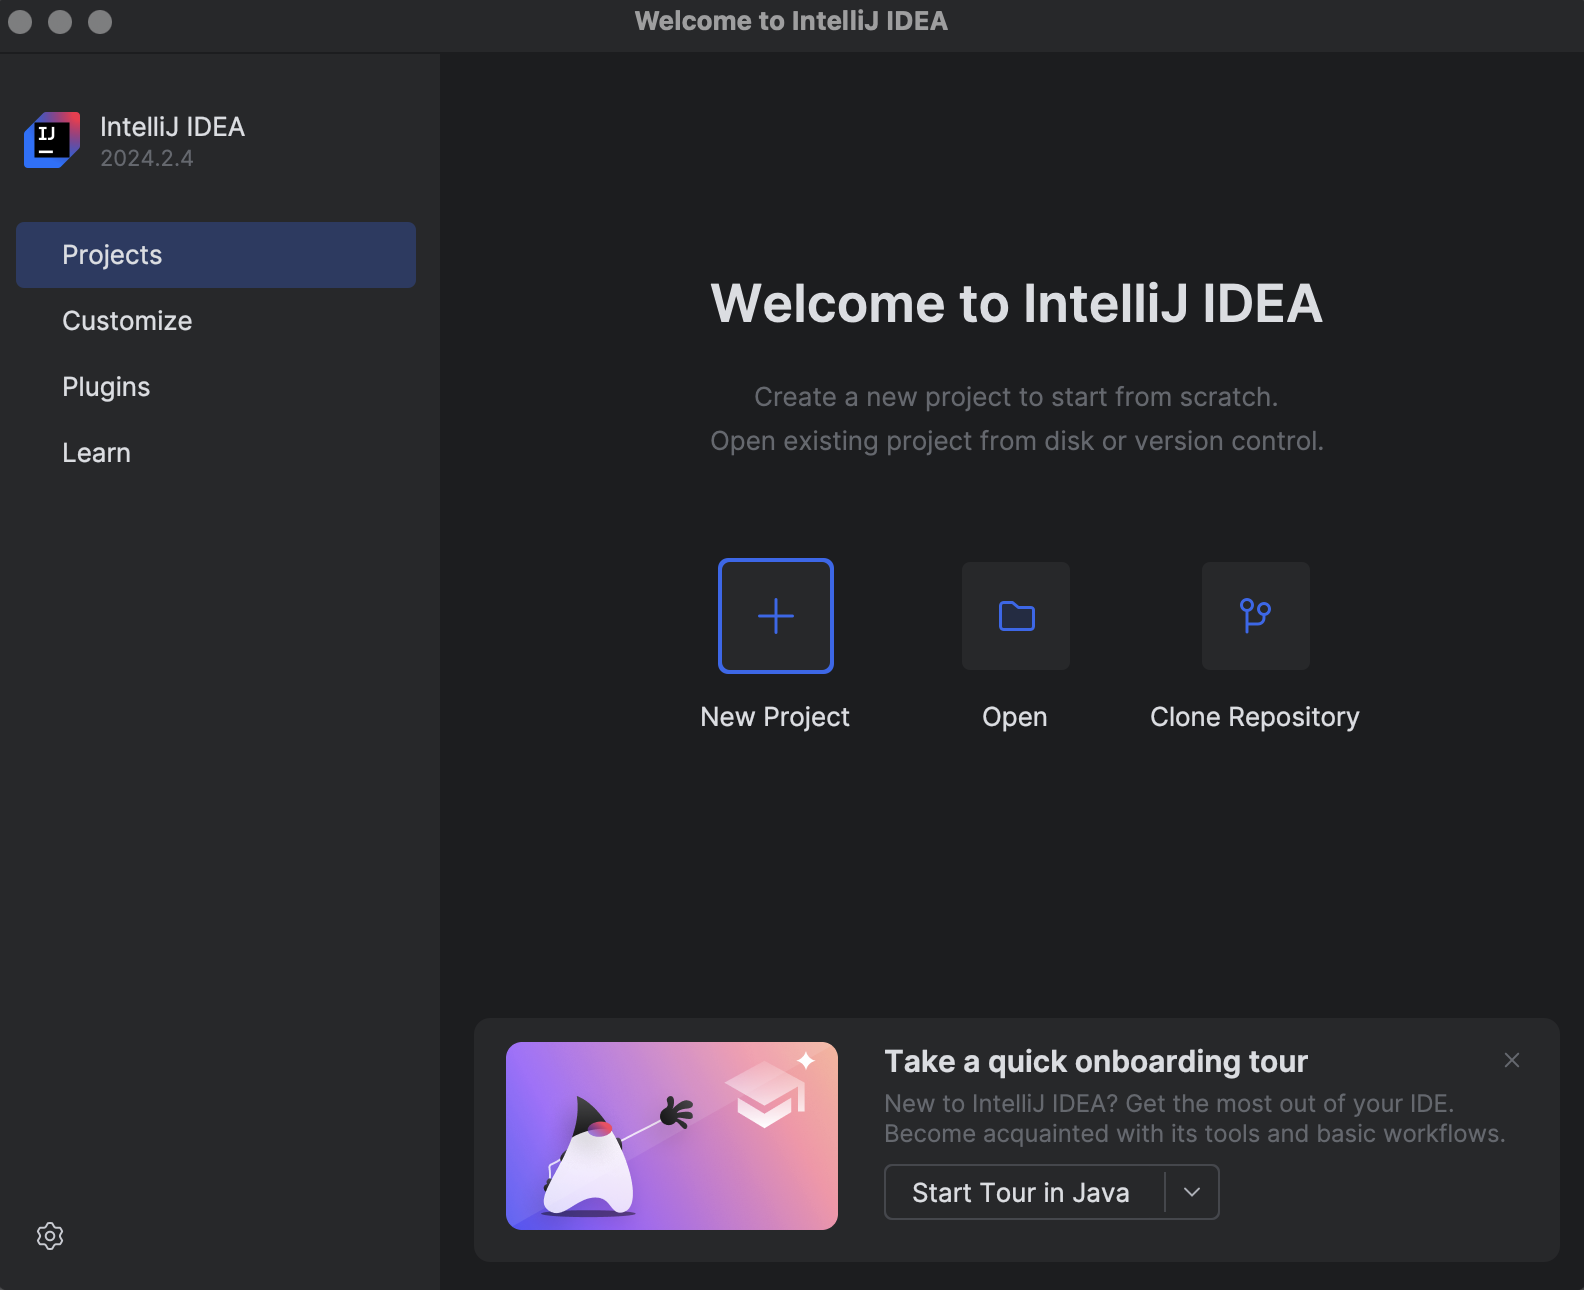
Once you have installed IntelliJ, open it and click on New Project
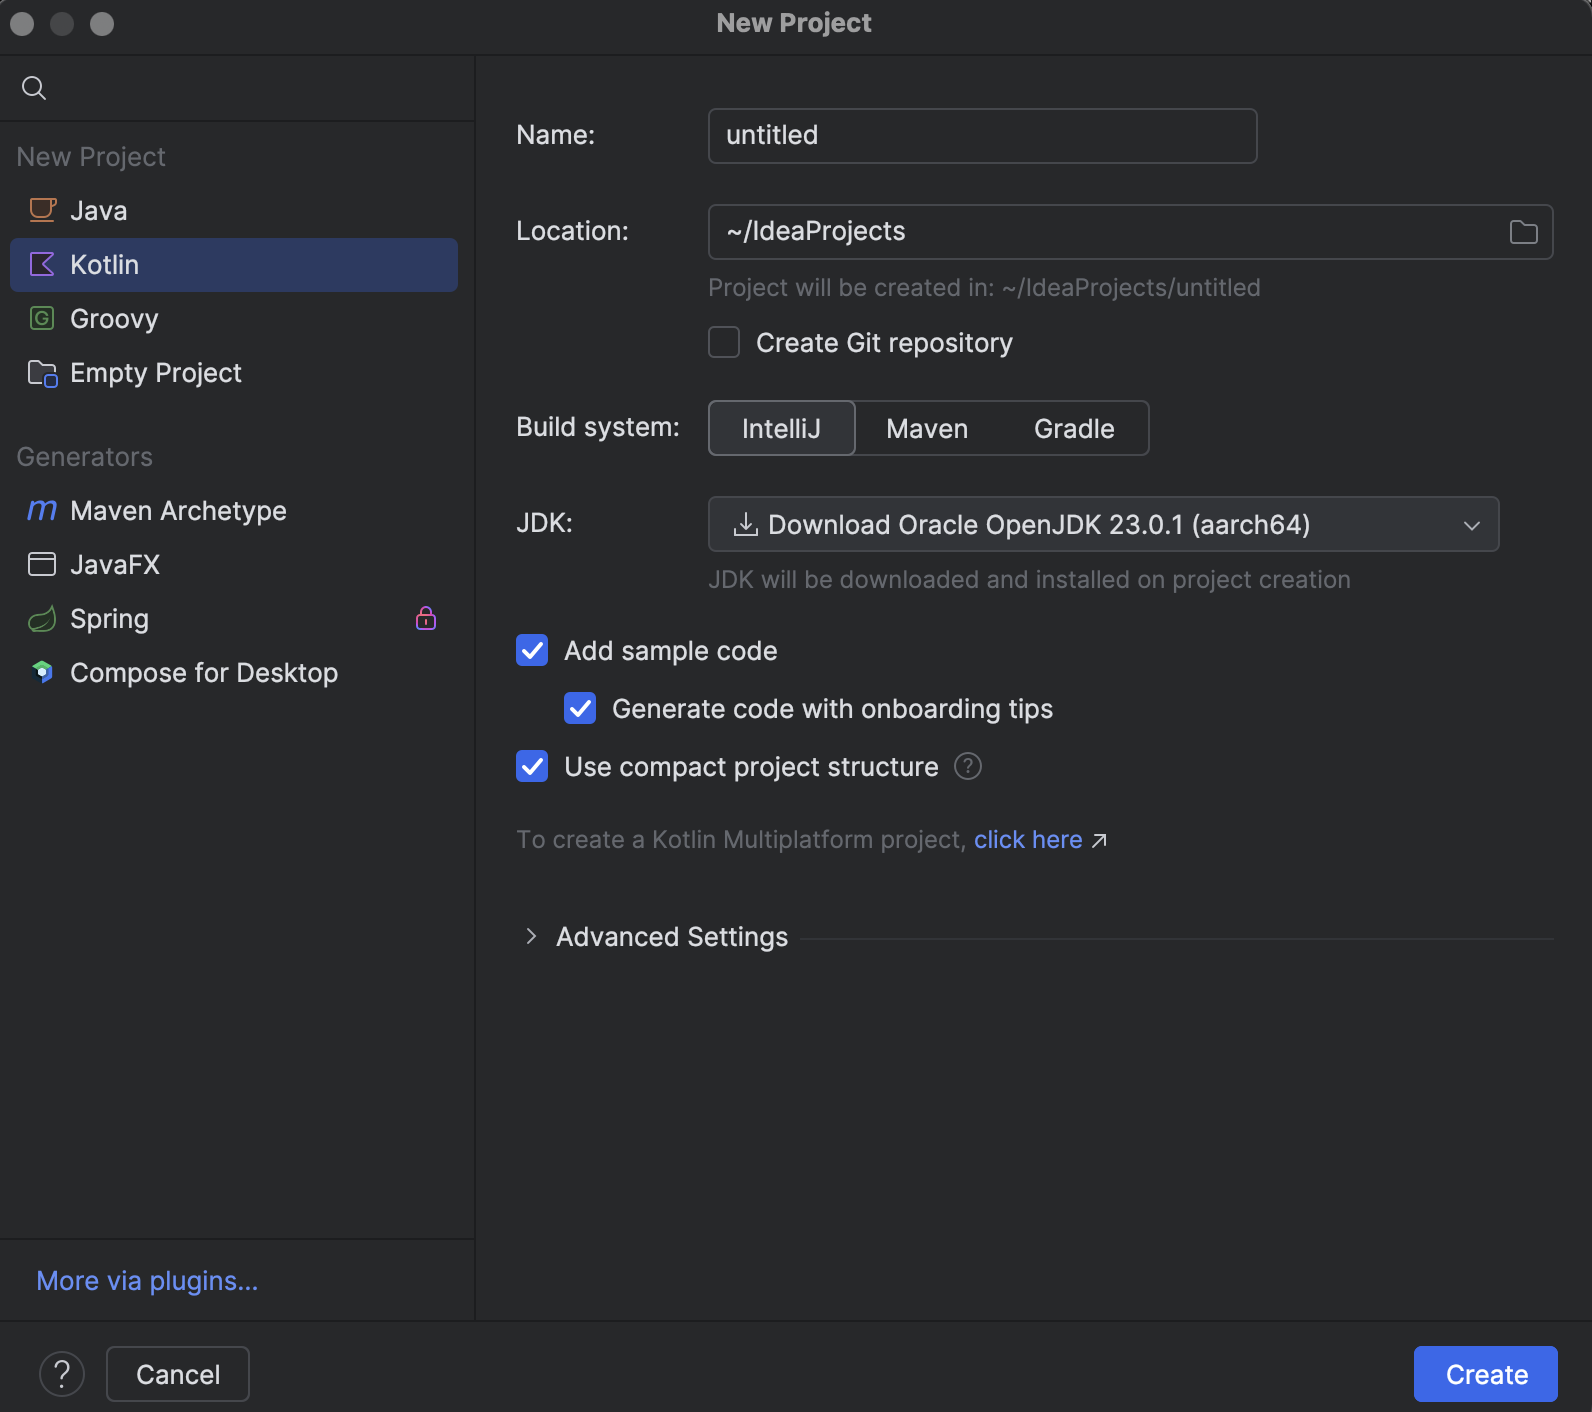
On the left side menu, select Kotlin. Uncheck “Add sample code” Then, enter a project name and select your JDK location path. Finally, click on Create.
Write Your First Kotlin Code
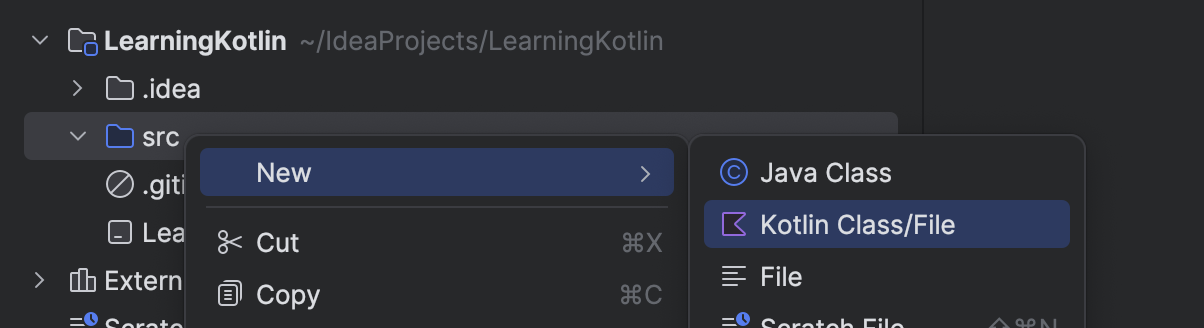
On the newly created project, click on the src folder, then choose Kotlin Class/File
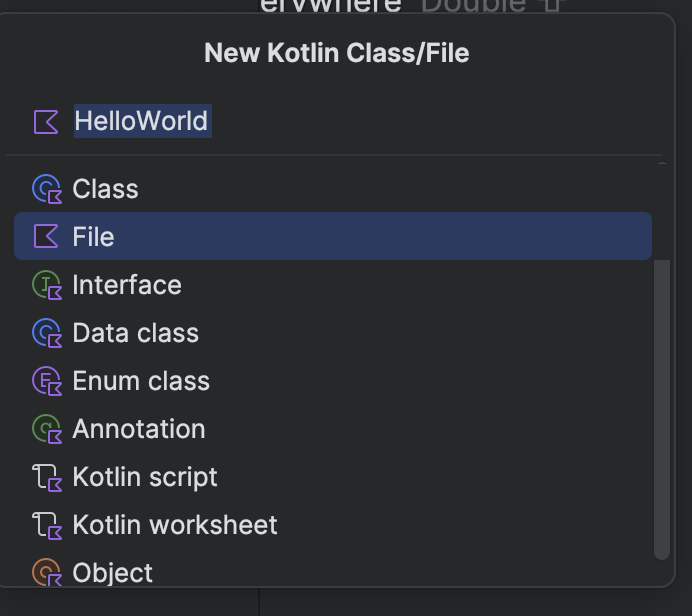
On the File selection type menu, give a name to your Kotlin file. It can be anything, we will name it “HelloWorld”. Then select File as a type.
On that file, type the following code.
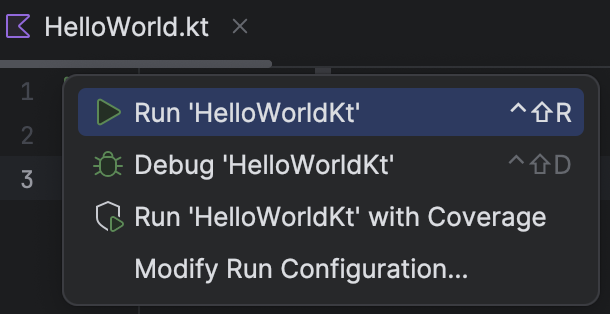
fun main() { println("Hello World!")}You should see a green play button to run the code, click on it to run your code.
You should see “Hello World!” printed out!
Great job! 🎉 You’ve successfully written your first Kotlin code!
How Kotlin Code is Compiled and Runs on the JVM
Kotlin runs on the Java Virtual Machine (JVM), meaning Kotlin code is compiled into bytecode and executed by the JVM, just like Java. This ensures Kotlin is fully compatible with Java, allowing you to mix Kotlin and Java code seamlessly in the same project.
The Kotlin compiler converts .kt files into JVM bytecode (.class files`), and the JVM takes the generated code and runs it.
In the example above, when you clicked the play button to run your code, behind the scenes, the Kotlin compiler converted your code into bytecode, which was then executed on the JVM. Thanks to your IDE, this entire process happens automatically, so you don’t need to manage compilation or execution manually.
You can view the generated .class file by navigating to your project folder in the IDE. You’ll find an out directory, where the compiled HelloWorld class file resides.

Note: IntelliJ displays a decompiled version of the .class file to make it readable, but in reality, that file is written in bytecode, which is not human-readable in its raw form.
What’s Next?
Congratulations on completing your first Kotlin program! 🎉 You’ve now set up your development environment, run your first Kotlin code, and learned how Kotlin works with the JVM.
In the upcoming tutorials, we’ll dive deeper into Kotlin’s syntax and explore core programming concepts.
Stay tuned for more, and happy coding!